Google Chrome is widely known for its simplicity and speed, but many users are unaware of the powerful diagnostic tools built into the browser. Among these tools, Chrome Net Internals, especially the DNS section, plays a critical role in troubleshooting website loading issues, fixing DNS errors, and improving overall browsing performance. DNS problems are extremely common from websites not loading to wrong redirects and Chrome’s internal DNS system often holds the key to solving them. This guide explains in simple language how Chrome Net Internals DNS works, how you can flush Chrome’s DNS and cache, and how to troubleshoot common DNS-related issues in 2026.
What Is Chrome Net Internals DNS?
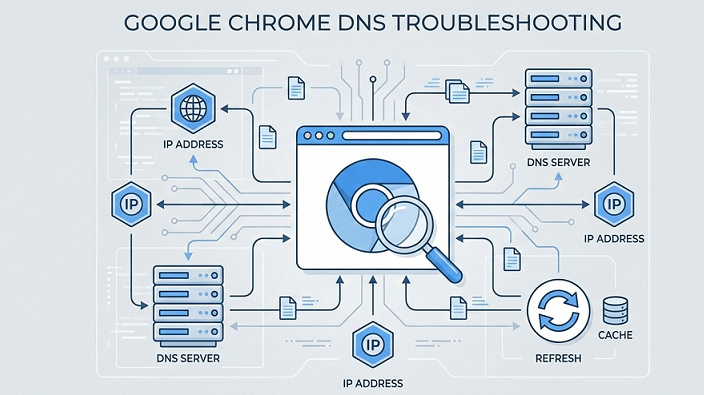
Chrome Net Internals is a hidden diagnostic panel inside Google Chrome that logs and displays real-time network activity. It includes features for monitoring DNS lookups, socket pools, security certificates, bandwidth usage, and more. Within this tool, the DNS section provides access to Chrome’s DNS cache, DNS queries, expiration timers, and host resolver mechanisms. It allows users to see exactly how Chrome resolves domain names, diagnose why certain websites might not load correctly, and clear old or corrupted DNS entries. In short, Chrome Net Internals DNS is a troubleshooting tool that helps you fix loading failures by giving Chrome a clean slate for domain lookups.
How Chrome’s DNS System Works?
Every time you type a website like example.com into your browser, Chrome must translate that human-readable name into a numerical IP address. It starts by checking its internal DNS cache, which stores previously resolved domains. If Chrome doesn’t find the information there, it checks the operating system’s DNS cache. If the domain still isn’t found, Chrome sends the request to your configured DNS server, such as Google DNS, Cloudflare, or your ISP’s servers. The DNS server responds with the correct IP address, which Chrome stores in its cache for future visits.
The reason Chrome maintains its own DNS cache is to speed up website loading. Without it, Chrome would repeatedly query your DNS server, slowing down browsing and adding unnecessary network load. Chrome often keeps hundreds of DNS records, each with its own expiration period. However, when a website changes servers, moves to new hosting, or updates records, Chrome’s cached IP address may become outdated. This results in errors or redirects, which is why flushing DNS becomes essential.
How to Access Chrome Net Internals DNS?
Google has been gradually transitioning from the old Net Internals interface to newer developer tools, but the DNS section remains accessible for flushing and diagnostic tasks. The simplest method to access the DNS page is by typing chrome://net-internals/#dns into Chrome’s address bar and pressing Enter. This takes you directly to the DNS debugging dashboard. You can also open chrome://net-internals/ and select the DNS section from the dropdown menu, but the direct URL is faster and more convenient.
Once the DNS tab opens, you’ll see Chrome’s host resolver cache, to clear cached entries, expiration timers, and live logs of DNS activity. This interface provides full visibility into Chrome’s DNS workflow, allowing you to identify entries that may be causing connectivity issues.
Understanding the Chrome Net Internals DNS Dashboard
The DNS dashboard displays several important elements. The Host Resolver Cache lists all the domains Chrome has recently resolved, including their IP addresses, DNS source, and expiration times. This section helps you identify outdated DNS entries that might be interfering with website access. The Flush Host Cache button instantly clears Chrome’s DNS memory, forcing it to fetch new DNS records. The dashboard also includes information on socket pools, which Chrome uses to maintain network connections. Sometimes, even if you clear DNS cache, the browser may continue using old connections stored in socket pools, so flushing them is also crucial.
The live DNS log section records ongoing DNS lookups and helps advanced users detect failing queries or repeated attempts to reach unavailable domains. By monitoring these logs, developers can troubleshoot persistent errors more efficiently.
How to Flush Chrome DNS Cache?
Flushing Chrome’s DNS cache is straightforward and can fix many common connectivity issues. First, go to chrome://net-internals/#dns and click the Clear host cache button. This removes all previously stored DNS entries. After that, navigate to chrome://net-internals/#sockets and click Flush socket pools. This step is important because Chrome sometimes maintains active or cached connections even after DNS has been cleared. Flushing the sockets ensures that Chrome reconnects using fresh DNS resolutions.
Performing both steps together solves issues such as websites not loading, incorrect redirects, DNS_PROBE errors, and even SSL related problems caused by outdated IP addresses stored in Chrome’s memory.
Difference Between Chrome DNS Cache and Chrome Browser Cache
Many users confuse DNS cache with browser cache, but they are completely different. DNS cache stores domain-to-IP mappings, allowing Chrome to connect to websites faster. Browser cache, on the other hand, stores website files such as images, stylesheets, and scripts to speed up page rendering. DNS cache affects connectivity and resolving domain names, while browser cache affects how websites look and feel. Clearing DNS cache solves issues like website not opening or loading the wrong domain, while clearing browser cache fixes layout problems, old images, and outdated content.
Chrome DNS cache is stored in the browser’s memory and only resets when you flush it. Browser cache is stored locally on your device and is cleared through settings or when using incognito mode. Understanding the difference helps determine which cache you need to clear to solve specific problems.
| Aspect | Chrome DNS Cache | Chrome Browser Cache |
|---|---|---|
| Purpose | Stores domain name to IP address mappings | Stores website files and resources |
| What It Caches | DNS records (IP addresses of websites) | Images, CSS, JavaScript, fonts, web pages |
| Function | Helps Chrome locate website servers faster | Helps web pages load faster |
| Works At | Network resolution level | Website content level |
| Impact on Speed | Reduces DNS lookup time | Reduces page load time |
| Common Issues When Outdated | Website not loading, wrong IP resolution | Old content loading, broken layout |
| When to Clear | DNS errors, site unreachable, server changes | Website display issues, slow loading |
| Clearing Method | chrome://net-internals/#dns | Chrome settings → Clear browsing data |
| Affects Login Sessions | No | Yes (may log you out of websites) |
| Storage Size | Very small | Can grow large over time |
| Data Persistence | Short-lived, expires quickly | Can persist for days or weeks |
| Security Impact | No user data stored | May store site-related data |
| Typical Users | Network troubleshooting | Performance and content troubleshooting |
Why You Should Flush Chrome DNS Cache?
You should flush Chrome DNS when you encounter problems such as websites not loading, incorrect redirects, DNS_PROBE finished errors, or situations where a website loads incorrectly on one device but works on another. DNS cache often becomes outdated if a website has migrated servers or changed web hosting providers, leading Chrome to still use the old IP address. The result could be loading failures, outdated content, or even missed security updates.
You may also need to flush DNS after switching proxies, changing VPN servers, modifying DNS settings, or working in restricted networks that manipulate DNS responses. However, it’s not necessary to flush DNS every day, and doing so will not improve performance unless there is an actual issue to correct.
Chrome Secure DNS (DNS-over-HTTPS) in 2026
Chrome supports DNS-over-HTTPS (DoH), which encrypts DNS requests to protect your privacy and prevent your ISP or network administrators from snooping on your browsing habits. This feature is found under chrome://settings/security, where you can enable Secure DNS and choose your provider, such as Cloudflare, Google, or Quad9.
Secure DNS offers increased privacy, prevents DNS hijacking, and ensures faster, more reliable DNS responses. However, some networks, especially public Wi-Fi or restricted corporate environments, block encrypted DNS traffic, causing DNS failures or slow browsing. In such cases, users often need to flush DNS to restore normal browsing.
Troubleshooting Common DNS Errors in Chrome
Several common Chrome errors relate directly to DNS issues. For example, ERR_NAME_NOT_RESOLVED appears when Chrome cannot determine the IP address of a domain. In most cases, flushing DNS cache and socket pools fixes the issue. Another common problem is DNS_PROBE_FINISHED_NXDOMAIN, meaning the domain cannot be found. This may happen due to misconfigured DNS servers or browser cache conflicts, and resolving it often requires clearing DNS in Chrome and your operating system.
If you switch networks frequently or use VPNs, you may encounter DNS_PROBE_FINISHED_BAD_CONFIG, which indicates an issue with your DNS configuration. Changing your DNS server to Google or Cloudflare and flushing Chrome’s DNS cache usually resolves it instantly.
You may also encounter situations in which a website has moved to a new hosting server, but Chrome continues loading it from the old server due to cached DNS. In such scenarios, flushing DNS and socket pools is the quickest and most reliable fix.
How to Flush DNS Cache on Windows and Chrome Together?
To fully reset DNS on both browser and system levels, you need to perform a combination of Chrome and operating system actions. After clearing Chrome’s DNS cache and socket pools, open the Windows Command Prompt and type ipconfig /flushdns, which clears the Windows DNS Resolver Cache. Restarting Chrome afterward ensures that all DNS lookups proceed fresh.
How to Clear DNS Cache on macOS?
On macOS, you can open Terminal and use the command sudo killall -HUP mDNSResponder. This command forces macOS to clear its DNS cache. When used together with Chrome’s DNS flush, this ensures that both browser-level and system-level DNS data are refreshed.
How to Clear DNS Cache on Android and iOS Chrome?
Chrome for Android does not always expose the full Net Internals interface, but typing chrome://net-internals/#dns may still give you access to the Clear Host Cache button. If this is unavailable, restarting the phone, toggling airplane mode, or clearing browsing data often resets DNS.
On iPhones, Chrome relies entirely on iOS system DNS. Airplane mode, device restart, or resetting network settings can flush DNS effectively.
A Universal Method for Fixing All Chrome DNS Problems in 2026
When faced with persistent DNS problems, there is a reliable five-step process that typically solves any issue. First, clear Chrome’s DNS cache. Second, flush Chrome’s socket pools. Third, clear your system’s DNS cache based on your operating system. Fourth, change your DNS server to a reliable public option like Google or Cloudflare. Finally, restart Chrome or your entire device. This process ensures that all layers of DNS from browser-level to system-level are reset and aligned with updated DNS records.
Final Thoughts
Chrome Net Internals DNS is one of the most powerful, yet underused troubleshooting tools that Google Chrome offers. It can fix everything from website loading failures to misleading redirects caused by outdated DNS records. Whether you are an everyday user, blogger, developer, or network engineer, understanding how Chrome handles DNS gives you control over many frustrating browser issues. By learning how to flush DNS, clear socket pools, and adjust DNS settings, you can troubleshoot browsing problems faster and more effectively than many IT professionals.