Deploying Scalable and Highly Available WordPress on Kubernetes: A Comprehensive Guide
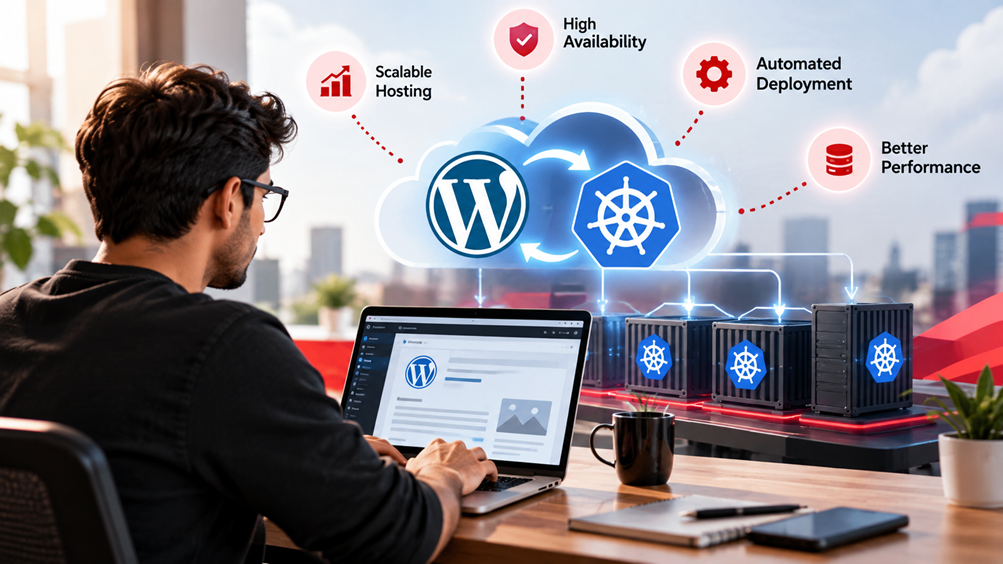
The digital landscape demands websites that are not only performant but also capable of scaling efforts-free to meet fluctuating traffic demands and resilient against outages. For WordPress, the world’s most popular content management system, achieving enterprise-grade scalability and high availability traditionally involved complex load balancing setups, manual server provisioning, and intricate failover mechanisms. However, a modern approach leveraging containerization and orchestration has emerged as a game-changer: deploying WordPress on Kubernetes.
Kubernetes, often abbreviated as K8s, is an open-source container orchestration system for automating application deployment, scaling, and management. By containerizing your WordPress application and its dependencies, and then orchestrating them with Kubernetes, you unlock unprecedented levels of flexibility, reliability, and efficiency. This guide will walk you through the entire process, from understanding the core concepts to a step-by-step deployment, management strategies, and optimizing for cost and performance. Whether you’re a freelancer managing client sites, an agency with a portfolio of high-traffic WordPress installations, an IT professional looking to modernize infrastructure, or a small business founder aiming for robust online presence, mastering WordPress on Kubernetes is a strategic move towards future-proofing your digital assets. We’ll demystify the complexities and provide actionable insights to transform your WordPress hosting strategy.
Understanding the Kubernetes Architecture for WordPress
Before diving into the practical steps, it’s crucial to grasp the fundamental Kubernetes components and how they specifically apply to running a WordPress site. Kubernetes manages an array of machines (nodes) within a cluster, abstracting away the underlying infrastructure so you can focus on your applications.
Core Kubernetes Concepts for WordPress
- Pods: The smallest deployable units in Kubernetes. A Pod encapsulates one or more containers (e.g., your WordPress PHP-FPM container, an Nginx reverse proxy container) and shared storage/network resources. For WordPress, you’ll typically have one Pod running your WordPress application container.
- Deployments: A higher-level abstraction that manages the desired state of your Pods. A Deployment ensures that a specified number of identical Pods are running at any given time. It handles rolling updates, rollbacks, and self-healing. For WordPress, you’ll define a Deployment for your WordPress application, specifying the Docker image, replicas, and resource requests/limits.
- Services: An abstract way to expose an application running on a set of Pods as a network service. Services enable communication between different parts of your application (e.g., WordPress Pods talking to a MySQL Pod) and expose your application to external users. For WordPress, you’ll need a Service to expose your WordPress application to the internet and another for your database.
- Ingress: A Kubernetes API object that manages external access to the services in a cluster, typically HTTP and HTTPS. Ingress provides URL-based routing, SSL termination, and virtual hosting. This is how users will access your WordPress site via a domain name (e.g.,
www.yourdomain.com). - Persistent Volumes (PV) and Persistent Volume Claims (PVC): Pods are ephemeral; if a Pod dies, its data is lost. WordPress needs persistent storage for its files (uploads, themes, plugins). A PV is a piece of storage in the cluster provisioned by an administrator or dynamically provisioned. A PVC is a request for storage by a user (your WordPress Deployment). Kubernetes binds a PVC to an available PV. This ensures your WordPress data remains even if Pods are recreated.
- StatefulSets: Similar to Deployments, but designed for stateful applications where Pod identity and stable persistent storage are important, such as databases. While you could run a database in a StatefulSet within Kubernetes, for critical production WordPress sites, a managed database service from your cloud provider is often preferred due to its inherent high availability, backups, and operational simplicity.
By understanding these components, you can envision how your WordPress application, database, and all their supporting infrastructure will be organized and managed within the Kubernetes ecosystem. The goal is to containerize WordPress, provide it with stable storage, expose it to the internet, and allow Kubernetes to handle the heavy lifting of keeping it running smoothly and scaling efficiently.
Prerequisites for Your WordPress on Kubernetes Journey
Before you can embark on deploying WordPress on Kubernetes, you’ll need to set up a few essential tools and accounts. This section outlines the groundwork necessary to ensure a smooth deployment process.
Essential Tools and Accounts
- A Cloud Provider Account: Use a managed Kubernetes service from a major cloud provider (GKE, EKS, AKS, DOKS, LKE).
kubectlCommand-Line Tool: Install and configure this CLI for managing your Kubernetes cluster.- Docker or Container Runtime: Needed if you plan to build custom WordPress images.
- A Domain Name: For public access to your WordPress site.
- DNS Management: Access to your domain’s DNS settings.
- Database Strategy: Decide between a managed database service (highly recommended for production) or a self-hosted database within Kubernetes. Managed services offer automated backups, replication, and scaling.
Planning Your Resource Requirements
Estimate expected traffic to guide the sizing of your Kubernetes cluster nodes, database instance, and resource allocations (CPU/memory) for WordPress Pods. Start conservatively and leverage Kubernetes’ autoscaling.
Step-by-Step Deployment Guide: WordPress on Kubernetes
This section provides a detailed walkthrough to deploy your WordPress application on a Kubernetes cluster using YAML manifests.
Step 1: Set Up Your Kubernetes Cluster
Provision your cluster using your chosen cloud provider’s tools. After creation, ensure kubectl is configured to connect by running kubectl get nodes.
# Example for Google Kubernetes Engine (GKE)
gcloud container clusters create wordpress-cluster --num-nodes=2 --zone=your-preferred-zone
gcloud container clusters get-credentials wordpress-cluster --zone=your-preferred-zone

# Example for Azure Kubernetes Service (AKS)
az group create --name wordpress-resource-group --location your-preferred-location
az aks create --resource-group wordpress-resource-group --name wordpress-cluster --node-count 2 --generate-ssh-keys
az aks get-credentials --resource-group wordpress-resource-group --name wordpress-cluster
Step 2: Configure Persistent Storage for WordPress
WordPress needs persistent storage for wp-content. Create a PersistentVolumeClaim (PVC).
apiVersion: v1
kind: PersistentVolumeClaim
metadata:
  name: wordpress-pvc
spec:
  accessModes:
    - ReadWriteOnce
  resources:
    requests:
      storage: 10Gi
Apply it: kubectl apply -f wordpress-pvc.yaml. Verify with: kubectl get pvc.
Step 3: Deploy MySQL/MariaDB (or Connect to Managed Database)
For production, a managed database is strongly advised. For illustration, here’s a basic MySQL deployment within Kubernetes. Store credentials in a Kubernetes Secret first.
# mysql-secret.yaml
apiVersion: v1
kind: Secret
metadata:
  name: mysql-secret
type: Opaque
stringData:
  mysql-root-password: your_secure_root_password # CHANGE THIS!
  mysql-password: your_secure_wordpress_user_password # CHANGE THIS!
Apply secret: kubectl apply -f mysql-secret.yaml.
MySQL Persistent Volume Claim:
# mysql-pvc.yaml
apiVersion: v1
kind: PersistentVolumeClaim
metadata:
  name: mysql-pvc
spec:
  accessModes:
    - ReadWriteOnce
  resources:
    requests:
      storage: 20Gi
Apply PVC: kubectl apply -f mysql-pvc.yaml.
MySQL Deployment and Service:
# mysql-deployment.yaml
apiVersion: apps/v1
kind: Deployment
metadata:
  name: mysql
  labels:
    app: wordpress
spec:
  selector:
    matchLabels:
      app: wordpress
      tier: mysql
  strategy:
    type: Recreate
  template:
    metadata:
      labels:
        app: wordpress
        tier: mysql
    spec:
      containers:
        - name: mysql
          image: mysql:8.0
          env:
            - name: MYSQL_ROOT_PASSWORD
              valueFrom:
                secretKeyRef:
                  name: mysql-secret
                  key: mysql-root-password
            - name: MYSQL_DATABASE
              value: wordpress
            - name: MYSQL_USER
              value: wordpress
            - name: MYSQL_PASSWORD
              valueFrom:
                secretKeyRef:
                  name: mysql-secret
                  key: mysql-password
          ports:
            - containerPort: 3306
          volumeMounts:
            - name: mysql-persistent-storage
              mountPath: /var/lib/mysql
      volumes:
        - name: mysql-persistent-storage
          persistentVolumeClaim:
            claimName: mysql-pvc
---
apiVersion: v1
kind: Service
metadata:
  name: mysql
  labels:
    app: wordpress
spec:
  ports:
    - port: 3306
  selector:
    app: wordpress
    tier: mysql
  clusterIP: None
Apply MySQL: kubectl apply -f mysql-deployment.yaml. Wait for the Pod to run: kubectl get pods -l tier=mysql.
Step 4: Deploy WordPress Application
Create the WordPress Deployment using the official Docker image.
# wordpress-deployment.yaml
apiVersion: apps/v1
kind: Deployment
metadata:
  name: wordpress
  labels:
    app: wordpress
spec:
  replicas: 2
  selector:
    matchLabels:
      app: wordpress
      tier: frontend
  strategy:
    type: RollingUpdate
    rollingUpdate:
      maxSurge: 1
      maxUnavailable: 0
  template:
    metadata:
      labels:
        app: wordpress
        tier: frontend
    spec:
      containers:
        - name: wordpress
          image: wordpress:6.6.1-apache
          env:
            - name: WORDPRESS_DB_HOST
              value: mysql:3306 # If using managed DB, replace 'mysql' with your DB endpoint
            - name: WORDPRESS_DB_USER
              value: wordpress
            - name: WORDPRESS_DB_PASSWORD
              valueFrom:
                secretKeyRef:
                  name: mysql-secret
                  key: mysql-password
            - name: WORDPRESS_DB_NAME
              value: wordpress
          ports:
            - containerPort: 80
          volumeMounts:
            - name: wordpress-persistent-storage
              mountPath: /var/www/html/wp-content
      volumes:
        - name: wordpress-persistent-storage
          persistentVolumeClaim:
            claimName: wordpress-pvc
Apply WordPress: kubectl apply -f wordpress-deployment.yaml. Verify: kubectl get pods -l tier=frontend.
Step 5: Expose WordPress with a Service and Ingress
Expose your site to the internet with a Service and Ingress (assuming an Ingress Controller is installed).
# wordpress-service.yaml
apiVersion: v1
kind: Service
metadata:
  name: wordpress
  labels:
    app: wordpress
spec:
  ports:
    - port: 80
      targetPort: 80
      protocol: TCP
  selector:
    app: wordpress
    tier: frontend
  type: ClusterIP
Apply service: kubectl apply -f wordpress-service.yaml.
# wordpress-ingress.yaml
apiVersion: networking.k8s.io/v1
kind: Ingress
metadata:
  name: wordpress-ingress
  annotations:
    nginx.ingress.kubernetes.io/rewrite-target: /
    kubernetes.io/ingress.class: nginx
spec:
  rules:
    - host: your-domain.com # REPLACE WITH YOUR DOMAIN
      http:
        paths:
          - path: /
            pathType: Prefix
            backend:
              service:
                name: wordpress
                port:
                  number: 80
Apply Ingress: kubectl apply -f wordpress-ingress.yaml. Get Ingress IP/hostname: kubectl get ingress wordpress-ingress.
Step 6: Configure Domain and SSL
Point your domain’s DNS A/CNAME record to the Ingress address. For SSL, install cert-manager and update your Ingress manifest:
# Updated wordpress-ingress.yaml for SSL
apiVersion: networking.k8s.io/v1
kind: Ingress
metadata:
  name: wordpress-ingress
  annotations:
    nginx.ingress.kubernetes.io/rewrite-target: /
    kubernetes.io/ingress.class: nginx
    cert-manager.io/cluster-issuer: letsencrypt-prod
spec:
  tls:
    - hosts:
        - your-domain.com
      secretName: wordpress-tls-secret
  rules:
    - host: your-domain.com
      http:
        paths:
          - path: /
            pathType: Prefix
            backend:
              service:
                name: wordpress
                port:
                  number: 80
Apply this updated manifest. cert-manager will handle certificate provisioning.
Step 7: Post-Deployment Optimizations and Initialization
Complete WordPress installation via your domain. Implement caching (plugins, Redis/Memcached), a CDN, and image optimization.
Managing and Scaling WordPress on Kubernetes
Kubernetes excels at dynamic application management and scaling.
Horizontal Pod Autoscaler (HPA)
HPA automatically scales the number of Pods based on CPU utilization or custom metrics. Example for WordPress:
kubectl autoscale deployment wordpress --cpu-percent=70 --min=2 --max=10
This maintains 70% average CPU, scaling between 2 and 10 WordPress Pods.
Vertical Pod Autoscaler (VPA)
VPA adjusts CPU/memory requests/limits for containers, optimizing resource use. Use with caution as it can restart Pods.
Rolling Updates and Rollbacks
Deployments allow zero-downtime updates by gradually replacing old Pods with new ones. To update your WordPress image, modify wordpress-deployment.yaml and apply it. To rollback: kubectl rollout undo deployment/wordpress.
Monitoring and Logging
Crucial for performance and issue diagnosis.
- Prometheus and Grafana: Open-source stack for metrics collection and visualization.
- Elastic Stack (ELK/EFK): For centralized log collection, processing, and analysis.
- Cloud Provider Monitoring: Integrated solutions (Google Cloud Monitoring, AWS CloudWatch, Azure Monitor) offer easy setup.
Cost Control Strategies for WordPress on Kubernetes
Manage Kubernetes expenses effectively with these strategies.
Right-Sizing Resources
Set appropriate CPU and memory requests and limits for your Pods. Monitor actual usage to fine-tune these values and avoid over-provisioning.
Utilizing Spot Instances/Preemptible VMs
Use lower-cost, interruptible instances for stateless WordPress application Pods. Your database should run on standard, reliable instances.
Implementing Efficient Autoscaling Policies
Configure HPA with realistic minReplicas. Implement Cluster Autoscaler to dynamically adjust the number of nodes in your cluster, ensuring you only pay for what’s needed.
Common Mistakes When Deploying WordPress on Kubernetes and How to Avoid Them
Sidestep these common pitfalls for a stable and efficient setup.
- Ignoring Persistent Storage Requirements: Always configure PVCs for
wp-contentand the database to prevent data loss. Prioritize managed cloud database services. - Lack of Resource Requests and Limits: Set CPU and memory
requestsandlimitsfor all Pods to ensure stable performance and prevent resource exhaustion or excessive costs. - Inadequate Monitoring and Logging: Implement comprehensive monitoring (e.g., Prometheus/Grafana) and centralized logging (e.g., EFK stack) from day one with alerts for critical issues.
- Security Oversights: Use Kubernetes Secrets for credentials, never expose databases directly, implement Network Policies, keep software updated, and configure RBAC.
- Over-reliance on Default Settings: Customize Deployment, Service, and Ingress manifests, adjusting replica counts, resource settings, and autoscaling policies to fit your WordPress workload.
WordPress on Kubernetes: A Checklist for Success
Use this checklist for a robust and performant deployment:
✓ Managed Kubernetes cluster provisioned and kubectl configured.
✓ Ingress Controller installed.
✓ PersistentVolumeClaims for wp-content and database (if self-hosted) defined and bound.
✓ Database deployed (managed or self-hosted) with credentials in a Secret.
✓ WordPress Deployment with suitable Docker image, replicas, env vars, and volume mounts.
✓ WordPress Service (ClusterIP) created.
✓ Ingress for WordPress pointing to the Service, domain DNS updated.
✓ SSL/TLS configured via Ingress and cert-manager.
✓ Horizontal Pod Autoscaler configured for WordPress.
✓ Resource requests and limits set for all Pods.
✓ Caching, CDN, and image optimization strategies in place.
✓ Cluster Autoscaler configured.
✓ Monitoring (Prometheus/Grafana or cloud tools) and centralized logging implemented with alerts.
✓ Regular database and persistent volume backups configured.
Frequently Asked Questions (FAQ)
Here are answers to common questions about running WordPress on Kubernetes.
Q1: Is Kubernetes overkill for a small WordPress site?
A1: For very small sites, initial complexity might be high. However, for growth, high availability, or managing multiple sites, Kubernetes provides a robust, scalable, and efficient foundation.
Q2: How do I manage WordPress plugins and themes with Kubernetes?
A2: Plugins and themes are managed via the WordPress admin dashboard. Since wp-content is persistently mounted, changes are saved. For advanced setups, consider a Git-based workflow for updates.
Q3: What about WordPress updates?
A3: For core updates, it’s best to update your WordPress Docker image, test, then perform a rolling update. Minor updates can often be done via the dashboard with persistent wp-content.
Q4: Can I use different cloud providers for different parts of my WordPress Kubernetes setup?
A4: While technically possible, it adds latency and complexity. It’s generally recommended to keep all components within the same cloud hosting provider and region for optimal performance and simpler management.
Q5: How do I handle caching for WordPress on Kubernetes?
A5: Use WordPress caching plugins. For advanced caching, deploy Redis or Memcached as a separate Kubernetes Deployment and configure WordPress to use it for significant performance gains.
Q6: What’s the best way to back up my WordPress on Kubernetes?
A6: For managed databases, use the cloud provider’s native backup features. For self-hosted, implement dedicated backup jobs. For wp-content, leverage Persistent Volume snapshots or backup plugins.
Conclusion
Deploying WordPress on Kubernetes is a strategic decision that empowers you with unparalleled scalability, high availability, and operational efficiency. While it introduces a steeper learning curve than traditional hosting, the long-term benefits for growing websites, agencies and businesses are substantial. By containerizing your WordPress application, leveraging Kubernetes’ powerful orchestration capabilities, and adopting a cloud-native approach, you can build a resilient, performant, and cost-effective foundation for your digital presence.
This comprehensive guide has covered everything from architectural concepts and prerequisites to a detailed step-by-step deployment, advanced management techniques, cost control, and common pitfalls to avoid. Remember that the journey doesn’t end with deployment; continuous monitoring, optimization, and security vigilance are paramount. Embrace the power of Kubernetes, and transform your WordPress hosting into a robust, future-ready solution capable of handling any demand. The future of web hosting is dynamic, containerized, and orchestrated – and WordPress on Kubernetes puts you at the forefront.